Moving a family from one place to another is far more challenging than it first seems. Plants, however, exhibit the contrary. Although repotting container plants might seem intimidating, it can be pretty simple once you start. It is crucial to have a general understanding of the process if you have never repotted a plant. Continue reading for a repotting beginner’s guide.

When to Repot Plants
Your container plant will ultimately exceed its container if it is still alive. Depending on how quickly the houseplant grows, it might take months or even years, but it will happen. Identifying the appropriate time for repotting is the first step.
What to watch out for? Check to see whether the soil is drying out more quickly than usual. The pot’s capacity is reduced when the plant’s roots expand under the soil’s surface and occupy the space within. Look for roots that are emerging from the drainage openings.
The roots of the majority of potted houseplants eventually overlap and round the base of the container, causing them to become root-bound. When a plant reaches this stage, it seems like it is about to break through the container. It is time to repot if these warning signals are present. How often should plants be repotted? Whenever they reach this state.
Repotting is best done in the spring or summer when the plants are actively growing. This, however, is not a set rule. A plant will accept the move and profit from it if it is suffering in a container that is too small.
Repotting Container Plants
The plant’s root ball has to be taken out of the container in preparation for repotting; before attempting to remove the plant, water it well to speed up the process. Turn the container upside-down and support the soil surface with one hand if the plant is not too large. The pot should be moved with the other hand in a “throwing” motion. The plant usually slips out as a result of this. If not, whack the pot’s edge against anything solid until the rootball comes free.
If you do this with a recently placed plant, the floor will be covered with an abundance of dirt. However, the root ball often falls out whole when a plant is ready for a new container. You will probably find a solid soil and root structure resembling the pot you just removed.
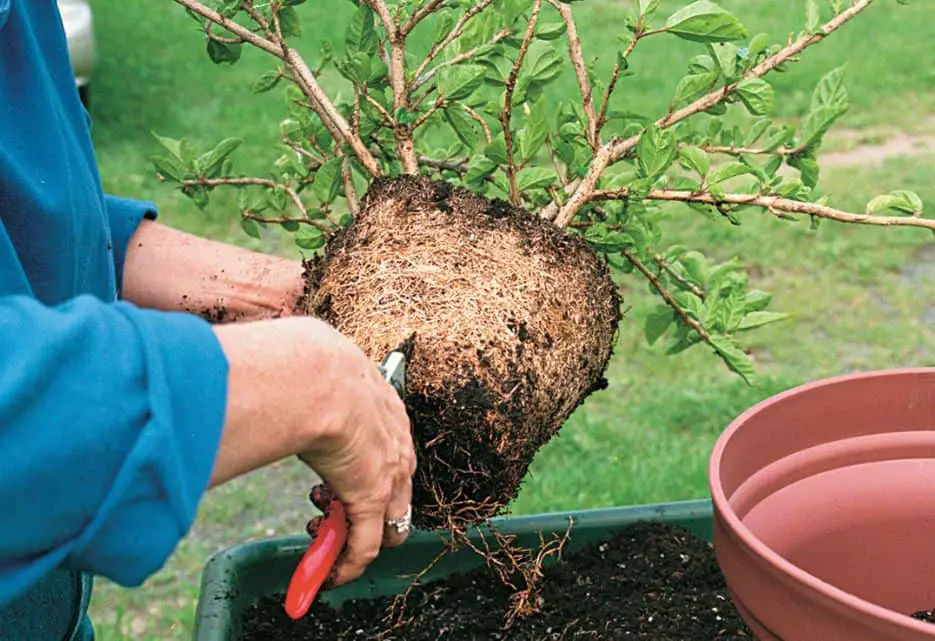
Pruning Roots
You should examine the roots after removing the plant from the container. Light-colored roots indicate health. Dark-colored roots may signify a major problem, such as rot or fungal infection. Trim any darker roots before removing them to lessen the number of roots that need to be packed into a container. The lower 1/3 of the root ball could be removed. The majority of what you remove will be a dense network of roots. Remove any circular roots as well.
For root trimming, pruning shears or a good garden knife work nicely. Making multiple vertical slices outside the remaining root ball is also beneficial. With your fingers, disentangle the remaining roots on the top and bottom of the root ball.
Completing the Move
Choosing a pot that is one size larger than the present pot is recommended. But you may go larger if you are familiar with the plant and anticipate quick development. Get the right potting soil, cover the drain hole with a mesh screen or a piece of broken pot, and plant the plant at the same depth as in the previous pot. Soil should be piled up around the root ball, and it should be well-watered.
After finishing, apply a light covering of soft soil-surface mulch, careful not to obstruct the root crown. The plant needs to be prepared to expand for at least another year at this time.