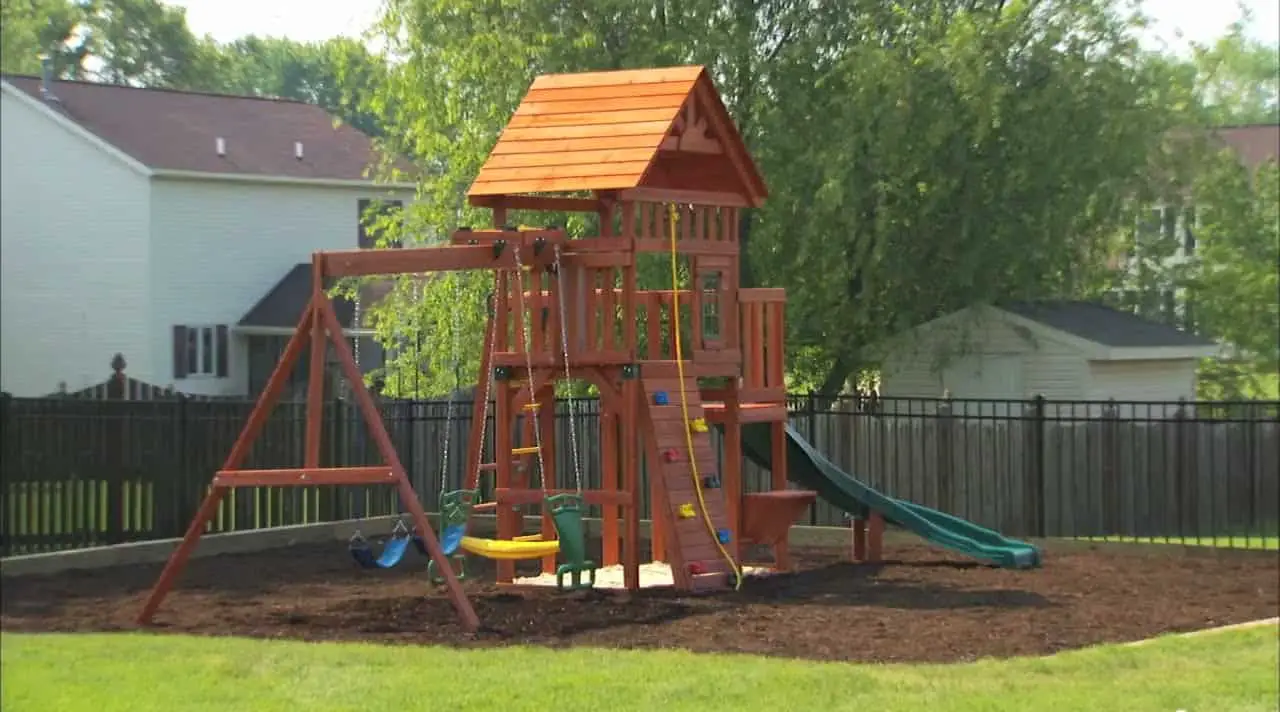
Sandboxes and playsets are a match made in heaven. They are symbols of childhood for good reason. The space under a playset is perfect for a sandbox, so much so that some playsets come with one standard. But if your playset doesn’t come with one, you may want to build one yourself.
How to make a sandbox under a playset? To build a sandbox under your playset, you will need to dig out the ground, lay out landscape fabric, install wood to create a box, and then fill the box with sand. You may also want to make some kind of cover to protect the sandbox.
Building a sandbox is a good beginner DIY project because it can be as simple or complex as you want it to be. In this article, I will take you through all of the steps you will need to take to build a sandbox under your playset, and I will give you a few creative alternatives.
Related: How To Clean An Outdoor Playset
Building a Sandbox under Different Types of Playsets

Playsets come in a variety of shapes and sizes and with a variety of features. Here are some things you should consider before you jump into building a sandbox under your playset.
Amount of Space under the Playset
If you want to put a sandbox under your playset, you will need to consider if there is enough space beneath the one you have.
Make sure there is plenty of headspace so that your children don’t smack their heads when they try to move around the sandbox. Additionally, if you have a large family of sand loving children, a 4 foot by 4 foot sandbox may not be big enough.
Pre-Framed Sandbox
How you go about building a sandbox under your playset will depend on the kind of playset base your playset has.
Playsets with rectangular bases often have an area underneath them that is designed to be turned into a sandbox. You can tell because the four posts supporting the platform above will be connected by boards at the base to form the sides of a sandbox.
A pre-framed sandbox makes building a sandbox simple as long as you want a shallow sandbox that sits directly on the ground. But if you want to go deeper, you will find it is not a good idea to use the pre-framed sandbox.
In these pre-framed sandboxes, the posts sit within the sandbox. You would be
disturbing the dirt that is supporting the weight of the entire structure, and
you could risk making your playset unlevel.
Shape of Base
Luckily, it is very easy to make the walls of a sandbox on your own. If you are building a sandbox under your rectangular shaped playset from scratch, then you will make a rectangular or square sandbox that takes up the entire area under the playset.
Not all playsets have rectangular bases, however. Many playsets take advantage of an A-frame construction which has a large open space beneath the clubhouse. Some playsets, usually the ones that are metal or plastic, have circular bases.
If your playset does not have a rectangular base, you can still build a playset under it. You would simply need to build the frame of the sandbox yourself. If you want the sandbox to take up the entire area beneath the playset, you may have to work with irregular shapes.
Safety Tips
If you are going to frame the sandbox yourself, be sure that all the walls of the sandbox are completely under the playset. If a sandbox wall sits beyond the base of the playset, it can be a trip hazard.
In addition, if a child falls from the playset and lands on the sandbox wall, the sandbox walls could cause the child to become seriously injured.
If the sandbox does not fill the entire area beneath the playset, you may want to ensure that there is enough space to walk or run around it or past it.
Selecting Materials for Your Sandbox

If you want your sandbox to be sturdy and long lasting, and for your family to get the most enjoyment out of it, you will want to select the right materials.
Sand
Buying sand should be simple but somehow it isn’t. There are three characteristics of sand that you will want to consider when making your purchase– playability, safety, and cost.
First of all, you want to select a sand that your children can play with in the ways that they enjoy. You will want the sand to be moldable when wet and feel like sand to the touch. Sand meant for use in construction is not really a good option for sandboxes.
Construction grade sand is meant to be used as a ground filler or to fill up sandbags. It isn’t meant for play, and it doesn’t make a great play medium. It usually contains more than just sand, and it because it is typically not a natural occuring sand, it can be very dusty.
Okay, so no construction grade sand. No problem. You would think that any bag of sand marked as “play sand” would be just fine. Well, think again.
Play sand is generally a version of construction sand that has been screened and washed to make it suitable for children to play with, but not all families find this to be true.
The problem is dust, and more specifically crystalline silica dust. Some sand, even play sand meant for use with children, contain crystalline silica dust, which is known to cause health problems.
Crystalline silica dust is typically created when crystalline silica is pulverized into a fine dust with machinery. This is generally only a problem with machine made sands. Natural sands will contain crystalline silica, but it will not contain the harmful dust, and the dust cannot be created without machinery.
Dusty play sand, whether it contains silica dust or not, is a problem for other reasons. It can cause allergies to act up, and if you have children with asthma playing in the sand box, it could cause them to have an asthma attack.
One of the most highly recommended play sands is Sandtastic White Play Sand. It is non-toxic, low dust, 100% natural, and it can be used indoors or outdoors. It is more expensive than other sand options, but the quality is premium.
The final consideration you will need to make when it comes to purchasing play sand is the cost. A 4 foot by 4 foot sandbox with 6 inches of sand, you could easily require 800 or more pounds of sand. This is about half a ton of sand or a ⅓ of a cubic yard.
All purpose sand costs about $5 per 60 pounds, which means you would be spending about $70 for your 4 foot by 4 foot sandbox.
Basic play sand costs about $10 per 100 pounds, which means you spend approximately $80 on sand for a 4 foot by 4 foot sandbox with a 6 inch sand depth
Sandtastic White Play Sand costs about $80 per 100 pounds according to their website, although if you shop around you may be able to find it cheaper. This means you would be paying $640 to fill up your sandbox.
None of these prices are bulk pricing. The cost of bulk sand is far, far less than the cost of these bagged options. The only problem is that not every supplier will sell it in smaller quantities. Check with your local sand and gravel suppliers for pricing. In addition, the delivery fee could be steep if you can’t pick up the sand yourself.
Wood
Any type of wood that is used to build a playset is sufficient for building a sandbox. If you want your playset to have a cohesive look, then you should choose wood that matches your playset. If your playset is made out of cedar, then the sandbox should be made out of cedar.
You could use a different wood, or wood scraps and stain them to match the rest of the playset to achieve a similar look.
There is an exception of course. Any wood that you might use below the dirt to create the sandbox wall should be designed to withstand the moist environment underground. Landscape lumber or pressure treated lumber is your best bet. Any untreated wood will deteriorate rapidly.
How Large Should the Sandbox Be?

The size of a sandbox is important. If a sandbox is cramped or uncomfortable to use, your children aren’t going to play with it as much as they would, and you won’t get that return on your investment.
The size of your playset and how many children will be using it will be the main determining factors to how big it should be.
If you are planning to use the posts of the playset to help create the frame of the sandbox, like you see on playsets with pre-framed sandboxes, then you will know exactly how large the sandbox should be.
Otherwise, you can frame up the sandbox independently of the poles. You will have more freedom to design the sandbox exactly as you would like it, and most importantly as deep as you would like it without impacting the level of the playset.
When thinking about sandbox size, the most important thing to take into account is how many children will be playing in it at one time. If you have multiple young children living in your home or if you have frequent visits from neighborhood children, then you will probably want a bigger sandbox to accommodate everyone.
Additionally, if you know your children are going to want to sit right in the sand while they are building, the sandbox will need to be quite large to provide enough space for both sitting and playing. If you children like to sit in the sandbox, you will also want to take into account the size of your children.
If you kids prefer to sit on the edge of the sandbox or kneel in the grass outside of the sandbox wall and lean in to play, then you won’t need as much space.
If the space under your playset does not provide enough room for everyone to play, you could always build a sandbox outside of the playset’s play area. The methods of construction are essentially the same.
The depth you choose to make the sandbox will depend on how much sand you have access to or have the budget for as well as if you have any deep diggers in your crew. Generally, you will want anywhere from 4 inches to 10 inches of sand to dig into.
If you have a child who loves to dig holes to the center of the earth, you may want to go even deeper than 10 inches. Anything less than 4 inches would not provide enough sand for a quality play experience.
Build the Sandbox

Once you have decided what materials you want to use and how big you want the sandbox to be, you can start the process of building the sandbox.
If your playset is already constructed and you have not been able to prepare the ground for a sandbox prior to construction, your best option for making the sandbox is to build the frame independent of the playset’s posts, but that fits nicely between them.
If you attach the framing to the posts, the posts will be inside of the sandbox, and you would have to dig out the ground near the posts to get the sandbox depth you want. This is unsafe and could cause your playset to become unlevel.
Of course you could remove the grass, attach some boards to the posts, and fill
it with sand, but the sand may leak out of the spots where the boards touch the
ground, and you would not be able to make a very deep sandbox.
The process outlined below explains how to build a sandbox beneath a playset with a rectangular shaped base that does not already have any sandbox framing installed.
Dig out the Sandbox

- Mark out the perimeter of where you want the sandbox to sit with stakes and string or landscape paint.
- Remove the sod using a shovel and dig into the ground 2 to 3 inches. Create a channel around the edge where your board will sit flush to the dirt. Discard the dirt and the sod or repurpose it.
- Do not remove dirt from under the playset’s post.
- Check that the area is level by using a carpenter’s level. The area where the boards will sit are the most important sections to get accurately level.
- Once everything is level, lay landscape fabric over the hole so that it covers the bottom and sides completely. If a few inches hang over the edge of the hole onto your grass that is fine. You can always trim it up later.
Build the Frame
- If you have access to a router, you can create smooth edges on the lumber you intend to use for the sandbox. This will look nice and help prevent injuries.
- Fit the lumber into the trenches you made for them. Check that they are level. If you use 4×4 lumber, it will provide enough of an edge that you children could sit on it, but 4×4 lumber will also cut into the size of your sandbox.
- Using three-inch deck screws, fasten the wood together at the corners.
- If using 4×4’s I recommend going at least two high for the sandbox. Attach the 4x4s to the ground using rebar spikes and a mallet. You will need to drill a ½ inch hole in the lumber to the ground, then pound in the spikes.
- Fill with sand, and you’re done!
Cover Options

Off the shelf sandboxes often come with covers to help keep it free of debris and to help keep pests out. But a sandbox cover will also keep moisture in. This moist, typically warm, environment is a breeding ground for bacteria and mildew.
If your cover does not allow air to circulate, you will need to wait for the sand to dry before putting the cover on.
Plastic Tarp
A plastic tarp is not the most beautiful solution, but it can be used in a pinch or until you figure out something you like better.
Place something tall in the center of the sand box like a 5 gallon bucket full of water to create a peak in the center. This will prevent water from pooling in the middle of the tarp. This is especially important if you get a lot of rain and if you get mosquitoes.
Then lay the tarp over the bucket and the sandbox and secure it.
Mesh Tarp
A mesh tarp made out of material like sunshade fabric is popular with playsets because it allows sun and air through the mesh. This will allow the sand to dry and not become moldy even if you cover it right after play.
You would need to figure out a way to keep the tarp on the sandbox, but there are several good options. You could build a frame, fasten snaps to it, or try a DIY rig like this, which involves using pipe to roll up the tarp when not in use and a hook to hold it in place when it is covering the sandbox.
Lattice
Wood or plastic lattice can be used over the top of the playset to keep out pests. It cannot be rolled up like the sun shade because it is rigid, but it can be set onto a frame that would cover the sandbox.
For added protection, you could attach a metal screen under the lattice to keep out small debris. Like the sun shade, lattice would let the sand dry while keeping out pests and debris.
Wooden Cover
You can also construct a sturdy wooden cover by building a cap that fits over the sandbox. If you want to add ventilation you can space the boards more, but if you prefer more protection from rain, you could make the tighter.
When making a wooden cover, you will need to use lightweight wood so that the cover can be easily moved.
Cover on Hinges
If you construct a lightweight cover, you could attach it to the sandbox with a set of hinges so that it would open and close like a door. This kind of cover may not work well with all types of sandboxes that go under a playset because there may not be space for it to open properly.
A unique solution would be to put sun shade fabric on a frame and attach it to the sandbox with hinges. Then use a hook and eye or other latching device to hold the sun shade upright against the playset posts. This will provide a nice shady environment for your child to play and keep the cover out of the way.
Bench as Cover
You could make a set of wooden benches that fit over the sandbox and that would keep out cats. When your children want to use the sandbox, you remove the benches, and you now have a place to sit.
Bonus Sandbox Features

Along with the typical buckets, shovels, and items scavenged from the recycling bin, here are some ways to enhance your children’s sandbox play.
Larger stones: Large stones can be used for decorative elements or they could be turned into pets, cars, houses… the sky’s the limit here.
Colored glass stones: Colored glass stones can be turned into water, grass, or lava in the made up world your children create.
DIY old fashioned balance: Why not slip a little math into their play? An old-fashioned balance will begin to teach children about weight and measurement.
Roads: Do you have a car lover? Then they will absolutely love a way to make a road that looks like a road. You could paint blocks or smooth, flat rocks to look like a road when lined up. Alternatively, you could paint the edge of the sandbox to look like a road.
Play kitchen items: As long as your child knows not to actually eat sand, they can busy themselves making pretend food all day like with the right materials.
Funnels with Tubes: Funnels alone are great for play but attach a tube to the bottom and you’ve got a firefighting hose, a gasoline pump, or a cake batter dispenser.
Pool Noodles: Pool noodles sliced longways down the middle can create ramps and slides. Cut into chunks, they serve the same purpose as rocks, but are safer if you’re going through the “throws everything” stage.
How to Keep Cats out of a Sandbox?

Cats. The biggest issue you could have with putting up a sandbox is that cats tend to think it is a prime location for relieving themselves. It isn’t hard to understand why. It does kind of resemble some kind of high-end litter box.
It is clearly essential that you do not allow cats to use your sandbox as a litter box. If a cat manages to sneak into your sandbox, you will need to remove all the sand and start fresh. Some recommend cleaning the sand, but this involves the use of a lot of bleach, which isn’t really a kid safe option.
To keep cats out of a sandbox, you should place a lid over the sandbox whenever it is not in use. This has the added benefit of keeping out other debris that would make your sand dirty, like falling leaves or grass trimmings.
You could also try mixing cinnamon into the sand or placing cinnamon sticks in the ground around the playset because cats do not like cinnamon at all. They are very sensitive to smells and will be able to smell the cinnamon even when you cannot.
There are also commercial sprays which say they will keep cats away, but make sure they are safe for use around children.
Alternatives to a Sandbox
Instead of building a sandbox, you could turn any large trough like item, like a plastic kiddie pool or a large mixing trough used in construction, into a sandbox. Both are inexpensive and durable.
Instead of placing a sandbox under the playset you could use pea gravel or large rocks as a play medium. This works well especially if your child likes to play with dump trucks and excavators instead of building sandcastles with the sand.
You could skip the box altogether and build a small sand/water/other filler table. This has the added benefit of being portable. It would be easy to remove when your child outgrows it or wants to use the space under the playset for something else. In addition, you could put a small mud kitchen under the playset. Mud kitchens have grown in popularity recently because dirt loving kids adore them. If your children aren’t as eager to play in the dirt, or you would rather they didn’t, and\ outdoor play kitchen is also fun and will lend itself to imaginative play.