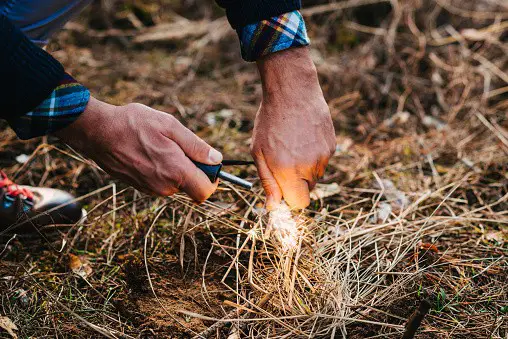
Whether the ground is covered in a blanket of shining snow, piles upon piles of fall leaves, or lush grass and blooming flowers, you can never go wrong with sitting around a blazing outdoor fire pit with friends and family. Granted, before you can enjoy the fire pit’s enveloping warmth and dancing flames, you need to light it.
If this is your first time setting an outdoor fire pit ablaze, or you’re uncertain if your preferred tactic is the best way to go, then this article is for you. Read on as we detail the easiest and most effective way to light an outdoor fire pit in minutes with just a few simple tools.
Gather the Right Materials
The most crucial element of building a fire pit that you want to last is using the best materials possible. Of course, you’re going to want your hefty logs of wood, but there are actually a number of smaller materials that are even more essential to a successful fire, and so, naturally, the first step is to acquire all of them.
In order to build a warm, long-lasting fire in your fire pit, you will need:
- Tinder
- Kindling
- A fire starter
- Logs
If any of these are unfamiliar to you, don’t worry. We’re going to briefly describe each material and the various options you can choose from in order to create that ideal fire.
Tinder
Before your blazing fire can feed off the large logs you have on hand, it needs something smaller to consume quickly for fast, intense fuel. This is where tinder comes in.
Tinder is essentially a material that is highly combustible and easy for your flames to catch and burn, allowing it to grow enough to move on to larger sources, like your kindling and logs. The nice thing about tinder is there are a number of natural resources you can use, such as dry leaves, grass, and pine needles, or you can use everyday household items, such as lint, cotton balls, or shredded newspaper.
Ideally, your tinder should be long, thin pieces of material that are no thicker than the lead of a #2 pencil at least the length of your hand. This ensures the material is easy to burn, but there is enough of it for your flame to feed until it catches on your kindling.
Kindling
The next step up your outdoor fire’s food chain should be your kindling. This is another material that will help your fire build and generate ample heat.
Compared to tinder, kindling is also a relatively highly combustible material but with a bit more substance, such as bark or twigs.
As opposed to tinder, which a fire will usually consume in mere seconds, kindling is there to ensure your fire can burn for at least a few minutes and gains the necessary strength to burn large longs, ensuring its sustainability.
A Fire Starter
This one is pretty straight forward. By a fire starter, we merely mean a tool that will allow you to create a spark or flame, such as a match, a lighter, or even a flint fire starting a stone. For those of you who are curious, no, we are not including any fire starting liquids or fuels, as the best and most sustainable fires are built without them.
Logs
The last material you’ll need is, obviously, logs, as this will eventually be the brunt of what fuels your outdoor fire pit’s fire once it has grown to a sufficient size and amassed enough heat. The most important thing to keep in mind here is that you want to make sure your logs are bone dry since damp logs are difficult to burn and wet logs are near impossible.
Build Formation
Now that you have all the necessary materials let’s start using them to build the ideal formation for a strong, quick-catching, and long-lasting fire.
Campers and outdoors people around the world frequently debate over which structure is best for a fire, but when it comes to an outdoor fire pit fire, the one we recommend is known as “the log cabin,” and here’s how to make it.
Steps to building the log cabin formation:
- Place a palm-sized bundle of tinder in the center of your outdoor fire pit bowl
- Create a teepee formation around the tinder bundle
- Place the two largest logs on either side of the tinder and kindling formation
- Place the next two largest logs perpendicularly on top of the previous two to start creating that log cabin formation
- Continue this process with the remaining logs, always placing the largest next and the smallest on top and gradually placing the smaller logs closer to each other as you reach the apex of the formation
This log cabin formation should provide enough stability for your fire to burn and grow while also providing sufficient space and air for it to breathe, as a suffocated fire will quickly smoke and die.
Light and Maintain
The moment of truth! You’ve gathered all the proper materials and created a log cabin formation sturdy enough to live in. Now, you get to see the fruits of your labor.
Use your fire starter of choice to light the tinder and kindling within your log cabin formation. As it burns, it ensures it has enough kindling, tinder, and air to grow.
If you find it is not burning your logs within a few minutes or is even dying down, you might want to add more tinder and kindling or slightly alter the formation to create more space and increase airflow.
Conclusion
You’ll want to keep a close eye on your fire pit’s fire when it’s first getting started, but you should find that once it’s sufficiently caught on your logs, you can kick back and relax while feeding it a new log and some kindling from time to time, to keep it going.


