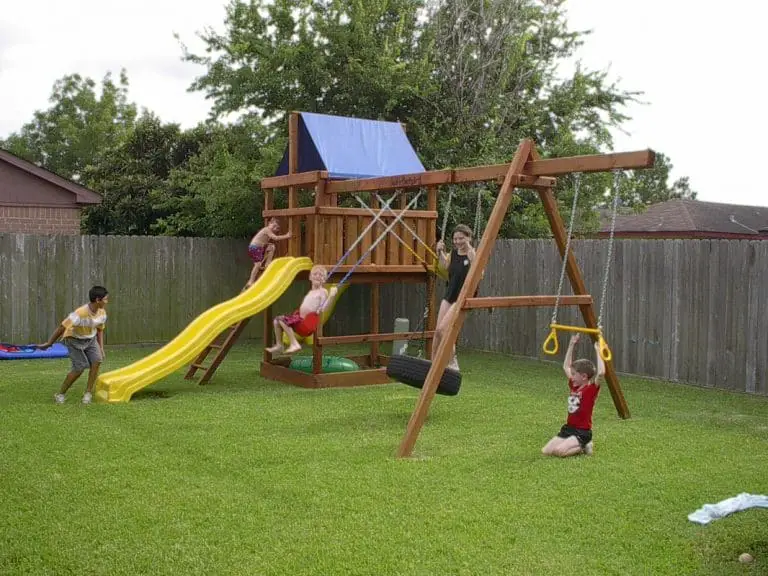
There isn’t a kid in the world who would say no to a playset in their backyard, but the cost of one is a stopping point for many families. If you enjoy a good DIY project, you could build one yourself for a fraction of the cost.
So, how do you build a playset for the backyard? With careful planning, you can build a playset for your family in your backyard by using a ready to assemble kit or by using one of many DIY playset plans available at retail stores or online.
But building the playset yourself isn’t as simple as hiring someone to build the playset for you. You will need to pick a location, prepare the ground, and select a playset that works best for your family and your yard. Continue reading for all the details on how to build a playset.
Related: How Long Does A Wooden Playset Last?
Building Your Own Playset

Building a playset using a ready to assemble kit or playset plans is a great way to save some money and make memories.
There are two methods of building a playset: a ready to assemble kit or with a set of plans. The ready to assemble kids sometimes come with pre-cut boards and sometimes they do not. Check the packaging before you purchase so you get the one you want.
Both methods for building a playset are similar with notable differences when it comes to selecting materials and the actual construction.
Here is an outline of the process:
- Pick the location
- Pick the playset you want to build
- Pick the wood, hardware, and accessories (if using a plan)
- Gather supplies and help
- Prepare the ground
- Build the playset
- Stain and seal the playset
- Create a soft landing with ground covering
- Maintenance
The real first step is being sure that you want to undertake this project. Building your own playset is no small feat.
Con #1: Time
Unless you are a confident woodworker or have taken on a similar project before, it will likely take you days to turn that patch of grass in your yard into a playset. A team of installers will have it done quickly.
Just how long it takes will depend upon the size and complexity of the playset you chose, how much leveling your ground requires, and whether you are using a ready to assemble kit or following a set of playset plans.
Con #2: Tools required
Building your own playset requires tools. If you’re using a ready to assemble kit, you may need a drill with screw bits and drill bits, socket wrenches, vise grips, wrenches, a level, and a hammer. If you are building from a plan you will require even more.
This isn’t a problem if you already have a wide variety of tools in your garage, but many families would have to purchase or borrow a few items to get the job done.
Pro #1: Cost
Building your playset on your own can help you save a ton of money. Typical playset installation costs between $389 and $948 dollars depending on the location that you live, the size of the playset, and how much leveling needs to be done (source).
Some playset installers will only minimally level the ground. If you require substantial ground re-leveling (more than 3 inches), you may have to hire someone else.
In addition, installation does not include the cost of creating a mulch pit or covering the ground with a suitable material.
The simplest way to cut down on the cost of a playset is to prepare your own ground, create your own mulch pit, and build the playset yourself.
Pro #2: Memory-making
You and your kids will always remember the days you spent building of the playset. It is very likely that your children will want to be involved. Maybe they can hold your hardware, get the next board, or rake out the ground covering.
They will get to experience the pride of helping build something, and when it is complete, they will think of those memories every time they play on it.
Pro #3: Customization and materials
If you build the playset using plans, you will have complete control over the quality of the materials used. You could pick out the best cedar or pressure treated boards at the lumberyard.
In addition, playset plans are typically customizable with optional add-ons like rock walls or gangplanks. You will have complete control over the customization without the added cost of working with a playset dealer.
Pro #4: Maintenance
By building the playset yourself, you will develop a deeper understanding of how all the pieces fit together. If a piece becomes damaged, you will be able to fix it yourself down the line with minimal difficulty.
Pro #5: Expansion
If you’ve done it once, you can do it again. You can add-on to your playset or alter it as your kids get older. If a rope ladder isn’t cutting it anymore, you can add a rock wall instead. If your family grows, your playset can grow too.
Step 1 – Pick the Location

Now that you’ve decided that building a playset is the right choice for you, let’s dig into what this really takes.
Depending on the size of your yard, you might not have a lot to work with, but ideally, your playset would be in an area that:
- Can be seen from your house
- Is already level
- Has no wires or tree branches overhead
- If possible, has some shade for those hot summer days
- Provides enough space for safe play
- Not in a swampy part of the yard
Playsets must have 6 feet of clear space around it on all sides. If your playset has swings, you will need even more space.
To determine how much space you need to keep the swing set on your playset
safe, you need to know the height of your swing beam. Double the height of the
swing beam to find how much space you need in front of the swing set and behind
it.
Example: If your swing beam is 5 feet high, then you multiply 5 by 2 to get 10. You would need 10 feet of clear space and ground covering at the front and 10 feet at the back of the swing set section of the playset.
Measure the space you have so that you do not purchase a kit or plans that involve a playset that is too large.
Many ready to assemble kits and plans provide play area measurements for you in the instruction manual as well.
Step 2 – Pick the Playset
Time to go shopping for your playset! You can find ready to assemble playsets at many box stores, but you can also purchase a playset from a dealer or online and put it together yourself.
There is a wealth of information available online about playset options, but nothing is a substitute for seeing them in person. You might want to check out a playset showroom to get ideas about what kind of features you would like.
Playset plans can be purchased online at varying prices with some as low as $25. Some playset plans include accessories like swing seats and hardware, but most do not include the slide. Pay close attention to what is included in the price.
Playset plans that come with some of the accessories can also be purchased at home improvement stores.
Step 3 – Pick the Wood, Hardware, and Accessories

If you decide to build your playset using plans, you will need to pick out and select all the wood, hardware and accessory pieces yourself. Even if you buy a kit with the plans, the kit typically does not include a slide or other large accessories.
Many plans will dictate which wood to use, but some say you can use any wood. Cedar or redwood are high-quality options that look great, but if you’re looking for something more economical, you could go with pressure treated wood.
Pressure treated wood was once treated with dangerous chemicals in order to make it resist decay and insects. Now, pressure treated wood uses less dangerous chemicals, but many families still choose to go with a more natural option to avoid chemical exposure.
Step 4 – Gather Supplies and Help
Gather all the tools and supplies you need to complete the job. You don’t want to be part of the way through and need to run to the store. Check the playset instructions and ensure that you have all of the tools and hardware required.
Here is a list of tools commonly needed to build a playset. Tools in italics are only used if you’re building the playset from a plan.
- Cordless drill
- Drill bits
- Socket wrench of varying sizes
- Shovel
- Garden rake
- Vise grips
- Hammer
- Tape Measure
- Level
- Stakes
- String
- Circular saw
- Carpenter’s square
- Safety glasses
- Dust mask
Depending on the plan you chose, you may need more or different tools. Always check the manual.
You will definitely need another set of hands when building a playset. They don’t necessarily need to be well-trained hands, but someone to hold a board while you fasten it in place will make things move much more quickly and safely.
Step 5 – Prepare the Ground
The ground must be leveled for the playset to be safe.
- Mark out the area you want to use for your playset with stakes and string.
- Ensure that the string is level. Line levels are great for this.
- Dig out the sod out of the whole area. Consider using a sod cutter for large areas.
- Move dirt from the high places to the low places and rake it out until it looks even.
- Check if the ground is level by measuring the distance between the string and the ground. It should be consistent all around the play area.
- Check the middle of the play area by using a long level.
- If you plan to lay down a ground covering, you may wish to dig deeper.
- It is also recommended that you lay your weed barrier down now.
If your ground is even to begin with, this will not be a huge job, but if you have a sloping or lumpy backyard, you’re in for some work.
Note: You will not lay the ground covering until after the playset is built.
Step 6 – Build the Playset
Now it is time to build the playset! Playsets come in so many varieties that the construction process is unique for each one. A pirate ship playset is going to be different from a simple swing and slide set.
Read and follow the instructions for your playset carefully.
Be prepared for this step to take a few days. Construction times can vary, but even a ready to assemble kit can take 24 to 30 hours to construct. Take your time and enjoy it!
Step 7 – Stain and Seal the Playset

Depending on the kind of wood you selected, you may need to stain and/or seal your playset. Pressure treated wood does not require any staining or sealing, but cedar and redwood require at least a sealant.
Staining your playset is an aesthetic choice. If you like the look of the natural wood, there is no need to stain it. If you want to stain the playset, you can use a stain and sealant in one and save yourself some time.
Sealing the playset is not really optional. Cedar and redwood resist insects and mold, but they aren’t impervious. Many of the warranties on playsets require that the playset be sealed to be covered under the warranty.
To seal the playset, you will need an outdoor sealant that resists mold and mildew and protects against UV rays. Also, look for a water-based sealant as it will not have the same fumes after drying that an oil-based sealant would have.
Some companies like Gorilla Playsets make a special playset specific sealant. Allow the sealant to dry for the recommended amount of time listed in the instructions (usually a few days) before playing on it.
Step 8 – Create a Soft Landing
To prevent injuries from falling, you will need to use a ground covering around the playset. The general recommendation is 6 feet all around the playset and double the height of the swing beam around the swing set if you have one.
If you followed the instructions of preparing the ground, you have already cleared this area.
It is recommended that you create an edge around the play area using landscape lumber or another durable material. This will help keep your ground covering from taking over your yard.
Consider using an edging material that you already use in other areas of your landscaping to give your backyard a polished look.
Materials
There are several different options you can use to cover the ground under a swing set including mulch, pea sand, and rubber mulch. Each has its own advantages and disadvantages.
| Mulch | Fine Gravel | Sand | Rubber Mulch | |
| The protection offered by 6-inch covering | 6-foot fall height | 6-foot fall height | 5-foot fall height | 10-12 foot fall height |
| Maintenance | Needs to be topped off every 1-2 years | May need to be topped off eventually. | May need to be topped off eventually. | May need to be topped off eventually. |
| Disadvantage | May attract insects as it degrades, often treated with chemicals. | Can travel into the lawn and cause problems for mowers. | Gets tracked into the house hidden in shoes. | Health safety of using shredded tires is unknown. |
| Cost* | $3.66 for 2 cubic feet | $3.98 .5 cubic feet | $4.97 .5 cubic feet | $6.94 for .8 cubic feet |
Bulk pricing is available for all these materials and is the more economical way to go. Pricing for bulk materials varies by location and whether you need the material delivered or if you can pick it up yourself.
Decide how deep you want your ground cover to be. The deeper the better in terms of safety. Unless you use rubber mulch, the material will settle quickly. Plan to put out extra material to achieve the depth you want or plan to top it off as soon as it settles.
The Consumer Product Safety Commission recommends 9-inch deep ground covering for playgrounds unless rubber mulch is used. When rubber mulch is used, they recommend 6 inches.
Your backyard playset is not so different from a playground. Consider laying out 9-inch deep ground covering especially if your playset features high platforms.
Step 9 – Maintenance

All wooden playsets require maintenance to keep them safe and looking good. Even the highest quality playsets will deteriorate if it is not well cared for.
Every year, you should:
- Check the playset for signs of insect infestation.
- Look for any damaged pieces and replace them.
- Inspect the playset for rough spots or splinters.
- Ensure that all the accessories are still in good condition.
- Clean the playset with soap and water or a pressure washer if it needs it.
- Reseal the wood (unless it is pressure treated wood).
- Tighten any loose bolts.
- Inspect the ground covering to make sure it is still as deep as you want it.
- If you have cold winters, take down any easily removable plastic pieces like the swing sweat to prevent the cold weather from causing damage to them.
- Take down canopies if you suspect a bad storm or hurricane is approaching your area. These can be easily damaged in storms.
Pressure treated wood requires the least maintenance, but you will still need to clean and inspect the playset to ensure no repairs need to be made.
And that is it! Now you can sit back and enjoy watching your kids spend their summer on your creation.