Title: How to Build a BBQ Island in Your Backyard
Are you ready to elevate your backyard barbecue experience? Imagine having a dedicated space for grilling that not only adds value to your home but also brings your outdoor cooking to a professional level. Building a BBQ island can provide you with all of that and more. It’s not just a practical addition; it’s a statement piece that says you take grilling seriously. In this blog post, I’ll walk you through the steps to build your very own BBQ island, bringing restaurant-quality features right to your outdoor space.
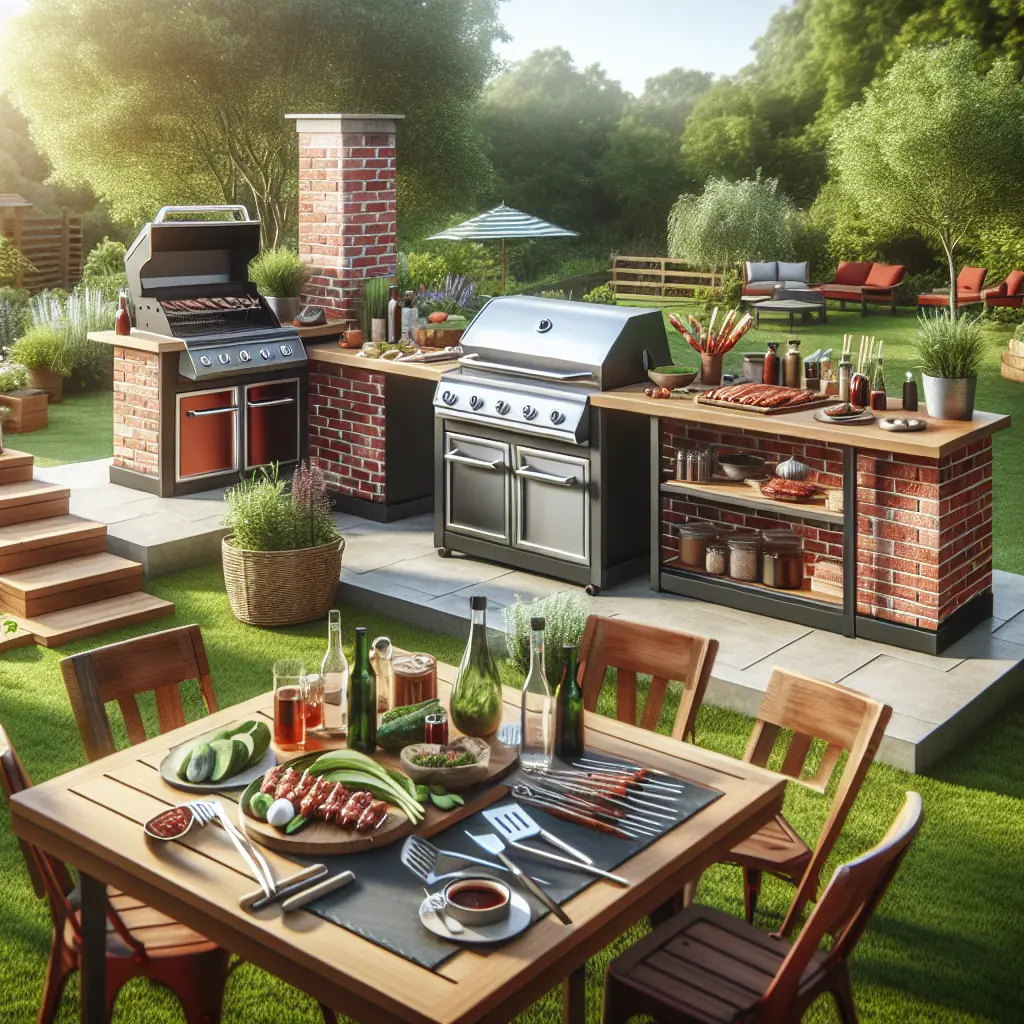
Step 1: Design Your Dream BBQ Island
Before you start building, it’s essential to design your BBQ island. Think about the space you have in your backyard and how you want to use the island. Will it be just for grilling, or do you want an outdoor refrigerator (Home Depot has a great selection), bar area, or storage compartments?
Consider the layout and ensure it complements the flow of your backyard. It’s a good idea to browse sites like Pinterest for inspiration. Remember, the design should be functional for cooking and entertaining but also harmonize with your outdoor décor.
Step 2: Choose Your Materials
The next step is selecting materials that can withstand weather elements and the heat from your grill. Some popular choices include concrete blocks, steel frames, and non-combustible materials for the exterior like stucco or stone. For countertops, granite or tile works well. Your material choices will affect not just the look but also the longevity of your BBQ island.
While shopping for materials, it’s wise to research suppliers with positive reviews for quality and durability. Websites such as Consumer Reports provide in-depth reviews and ratings on building materials.
Step 3: Plan for Utilities
Your BBQ island will need utilities like gas and electricity. If you’re not familiar with such installations, it’s crucial to hire a professional to handle it. Working with gas lines and electrical wiring requires expertise to ensure safety and meet local building codes. This is not a DIY step unless you are properly licensed.
Step 4: Build the Frame
The frame is the skeleton of your BBQ island and it needs to be strong. Steel frames are a popular choice because they’re durable and easy to assemble. You can find kits online or at your local home improvement store. The frame should support the weight of the grill, countertop, and any other features you plan to add.
Step 5: Install the Countertop
Once your frame is set up, it’s time to install the countertop. This is where materials like granite or tile come in. Measure twice and cut once to ensure a perfect fit. Be sure to consider holes for utilities like a sink or electrical sockets.
Step 6: Add Appliances and Storage
With the frame and countertop in place, you can now add your grill and any other appliances like a fridge or smoker. You might also want to include drawers or cabinets for storage. Remember to choose appliances designed for outdoor use. A reputable retailer like BBQ Guys specializes in outdoor kitchen appliances.
Step 7: Apply Finishing Touches
Finish the exterior of your BBQ island with materials that compliment your backyard’s style. Stone veneer offers a rustic look, while stucco is a more modern option. You can also add lighting for nighttime grilling and decorative touches that reflect your personality.
Step 8: Enjoy Your BBQ Island
Once everything is installed and the finishing touches are complete, it’s time to fire up the grill and enjoy. Invite friends and family over for a cookout and show off your new BBQ island. Not only will it make cooking more enjoyable, but it’s also a significant investment in your home.
Maintenance and Upgrades
Your BBQ island will need regular cleaning to keep it functioning and looking its best. Protect your investment by using grill covers when not in use, and periodically check for any wear and tear. Also, as technology advances, you may want to upgrade appliances or add features to your island.
Conclusion
Building a BBQ island is a project that can bring immense value to your outdoor living space. It requires careful planning, choosing the right materials, and sometimes enlisting professional help for utility installations. By following these steps and adding your personal touch, you’ll have a functional and stylish BBQ island that will serve as the heart of your outdoor gatherings for years to come.
Remember, the key to a successful DIY project is preparation. Take the time to plan each step, and don’t shy away from asking for expert advice when needed. Your backyard BBQ island will not only impress your guests but also make your cooking endeavors more enjoyable and efficient.
Are you excited to build your BBQ island but looking for more detailed instructions? Feel free to reach out in the comments below or check out in-depth guides from Home Improvement experts. Whether you’re a novice or a seasoned griller, there’s no better time to start crafting the backyard kitchen of your dreams.